

Full PC Assembly
Watch the full physical build if you want to see the pace, hand placement, and order of operations.

Build Guide
A beginner-friendly Atlas walkthrough, split into practical chapters so you can build, check, boot, and install Windows without scrolling through a wall of instructions.
Watch the full physical build if you want to see the pace, hand placement, and order of operations.
A quick breakdown of the board so the labels, slots, headers, and cables feel less mysterious.
The Build
The page is still complete, but it is now broken into sections you can actually use while building. On mobile, each step becomes a clean card with the image first.
Chapter 01
CPU, RAM, and storage are easiest to install while the motherboard is still flat on the table.
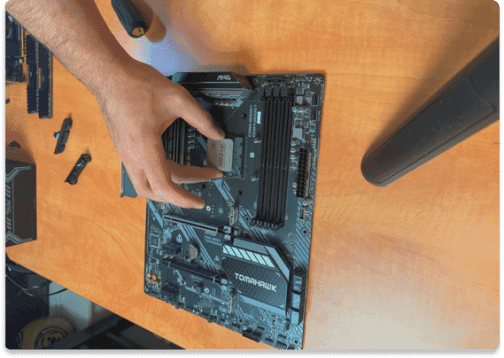
Carefully place the CPU into the socket, matching the triangle on the chip to the triangle on the socket. Gently lower the retention arm to lock it in place.
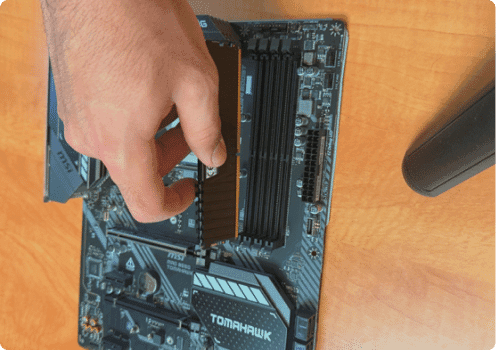
Align the notch on the RAM stick with the slot and press down firmly until both clips snap into place.
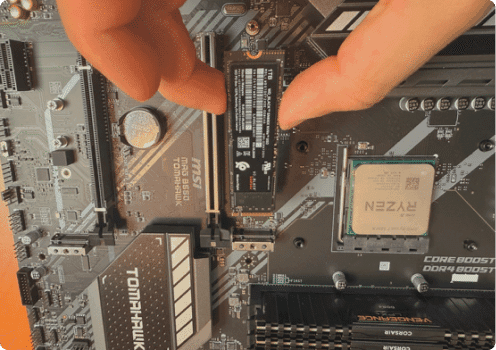
Insert the M.2 SSD at an angle into the slot, then press it down and secure it with the mounting screw.
Chapter 02
Mount the board, add paste, and lock down the cooler before the system gets crowded.
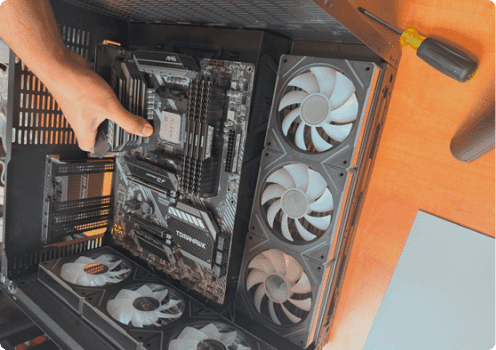
Lay the motherboard into the case, aligning it with the standoffs and rear I/O. Secure with screws provided by your case.
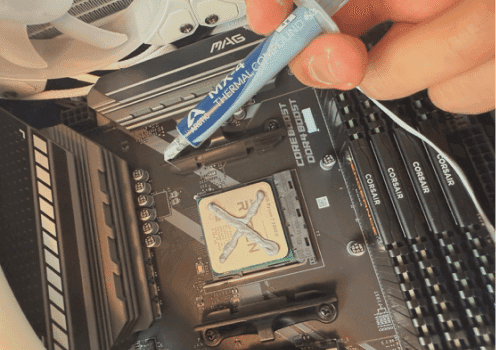
Apply a small dot or an "X" of thermal paste to the center of the CPU. Do not overdo it. A little goes a long way.
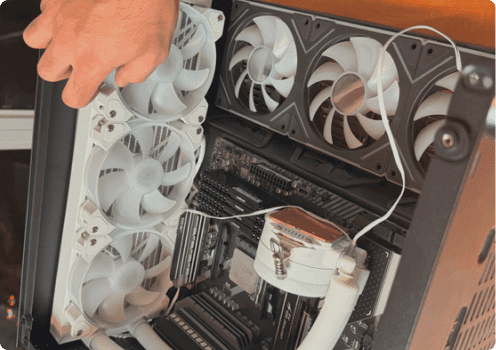
Mount your CPU cooler on top of the CPU, securing it with the included brackets or screws. Attach the cooler's fan cable to the CPU_FAN header.
Chapter 03
This is where most first-boot problems happen, so the cable checklist matters.
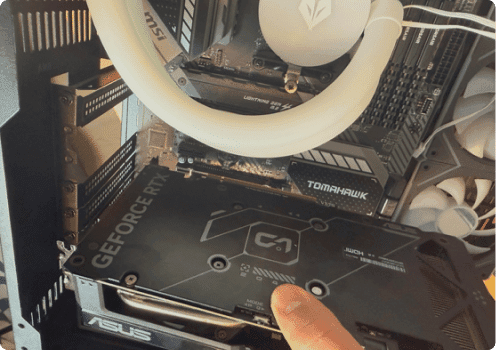
Insert the graphics card into the top PCIe slot until it clicks. Secure with screws at the case bracket. Connect PCIe power cables from the PSU to the GPU if needed.
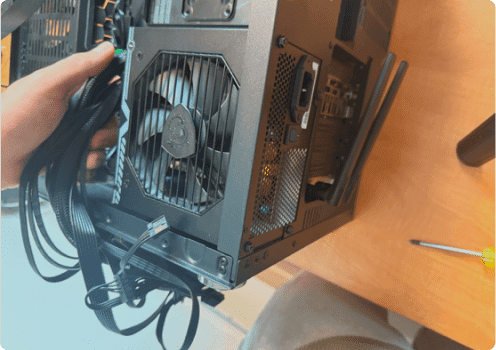
Install the power supply in the case. Plug the 24-pin ATX cable into the motherboard, the 8-pin CPU cable into the top of the board, and PCIe cables into your GPU. Plug in SATA power for drives if needed.
Chapter 04
Make it tidy enough, connect display to the GPU, and get ready for software setup.
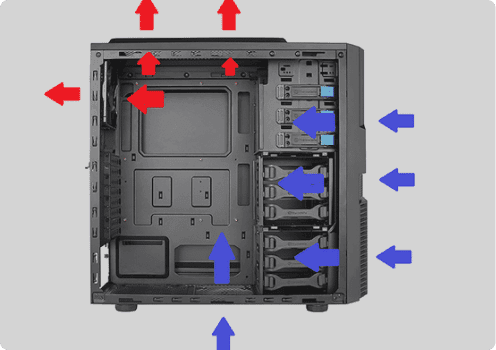
Install your case fans so airflow goes front-to-back and bottom-to-top. Plug each fan into SYS_FAN or CHA_FAN headers on the motherboard.
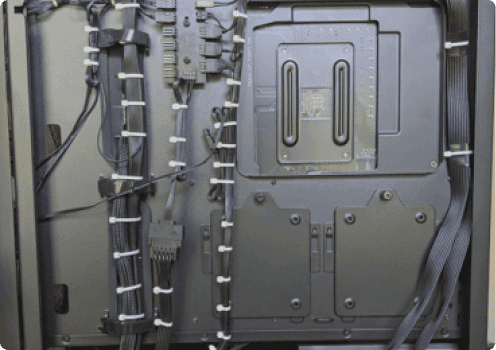
Organize the wires in the back using zip ties, velcro ties, or twist ties. This is not mastered on the first try, so do not worry if it is not perfect.
First Boot
Most first-build problems come from one loose cable or the display plugged into the wrong port. Check these before troubleshooting anything complicated.